
Adding a Webcam to Homekit Using a Raspberry Pi 3
Previously, I had setup HomeKit connecting to Nest thermostat and Belkin WeMo devices using Homebridge project. I had on my TODO list for a long time to put a webcam on HomeKit. At the end of some twists and turns it ended up being relatively easy, had I known the following from the start.
Using homebridge-camera-ffmpeg plugin
There is a homebridge plugin that transcodes a provided video stream into the formats needed for HomeKit. It uses ffmpeg project to achieve this, and the latest package for ffmpeg on Raspbian includes the OMX extension needed for using hardware encoding features for H264 video.
homebridge-camera-ffmpeg on GitHub
Installing homebridge-camera-ffmpeg
Installing on my Raspberry Pi 3 was as simple as any other homebridge plugin:
sudo apt update
sudo apt install ffmpeg
sudo npm install -g homebridge-camera-ffmpeg
You may not strictly need sudo for npm depending on your system config, but on my setup, I now use it.
USB webcam - Logitech C615
ffmpeg can connect to an IP webcam streaming available on your network. It can also use the Pi camera or other supported USB webcams as its video source.
In my case, I am attaching a USB webcam I had available. It is in one of the USB ports that are on the same Raspberry Pi running homebridge on my home network.
This needs the user that runs homebridge to have permission to access the /dev/video0 device where the kernel interface to camera gets made available. In my setup, the user is homebridge and the video group is video. In my case I also wanted to use command line from default pi user to try different ffmpeg CLI settings, so I added that user too.
sudo usermod -aG video pi
sudo usermod -aG video homebridge
You’ll probably need to log out and/or reboot for these changes to get propagated.
You can use ffmpeg to test your webcam and codec together. For example, I ran this command on Raspberry Pi (as user pi):
ffmpeg -f v4l2 -framerate 30 -video_size 1280x720 -i /dev/video0 -pix_fmt yuv420p -c:v h264_omx output.mkv
Type [q] when you’re satisfied to exit the command. It uses the h264_omx codec on a stream from the webcam (using its video device). This will create an .mkv file that you can inspect. I use scp to transfer to a Mac, and use VLC.app to view the video file.
Settings in config.json
Finally for homebridge to use the plugin, you need to configure settings in your config.json file.
I am not sure the snapshot/still image feature is working yet, but adding this to my platforms in Homebridge config.json was sufficient for video streaming.
   {
      "platform": "Camera-ffmpeg",
      "cameras": [
        {
          "name": "BasementCam",
          "videoConfig": {
              "source": "-f v4l2 -r 30 -s 1280x720 -i /dev/video0",
              "maxStreams": 2,
              "maxWidth": 1280,
              "maxHeight": 720,
              "maxFPS": 30,
              "vcodec": "h264_omx"
          }
        }
      ]
   } // ...
I test changes to my config.json for homebridge running under systemd using something similar to:
sudo systemctl restart homebridge
sudo journalctl -f -u homebridge
The journalctl command looks at a live logfile for running homebridge
Checking the Homebridge logfile
sudo journalctl -f -u homebridge
[...]
Feb 11 11:55:22 rpih1 homebridge[423]: Snapshot -f v4l2 -r 30 -s 1280x720 -i /dev/video0 -t 1 -s 480x270 -f image2 -
Feb 11 11:55:33 rpih1 homebridge[423]: -f v4l2 -r 30 -s 1280x720 -i /dev/video0 -threads 0 -vcodec h264_omx -an -pix_fmt yuv420p -r 30 -f rawvideo -tune zerolatency -vf scale=1280:720 -b:v 299k -bufsize 299k -payload_type 99 -ssrc 16554011 -f rtp -srtp_out_suite AES_CM_128_HMAC_SHA1_80 -srtp_out_params s4nKE/2JIwGYncQWPSXgVtKWF8TfAcVhFO5euEUN srtp://10.0.1.90:50104?rtcpport=50104&localrtcpport=50104&pkt_size=1378
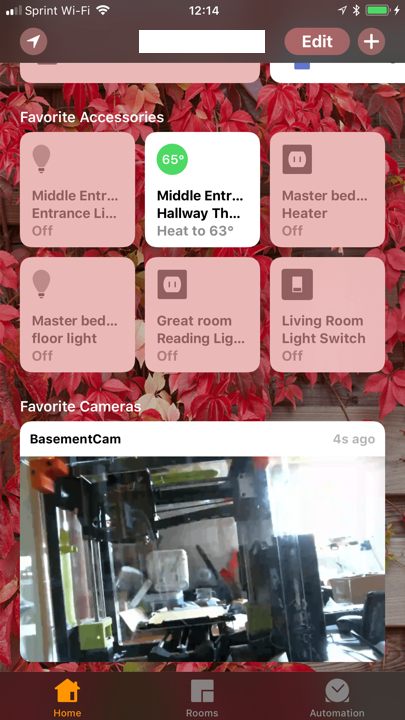
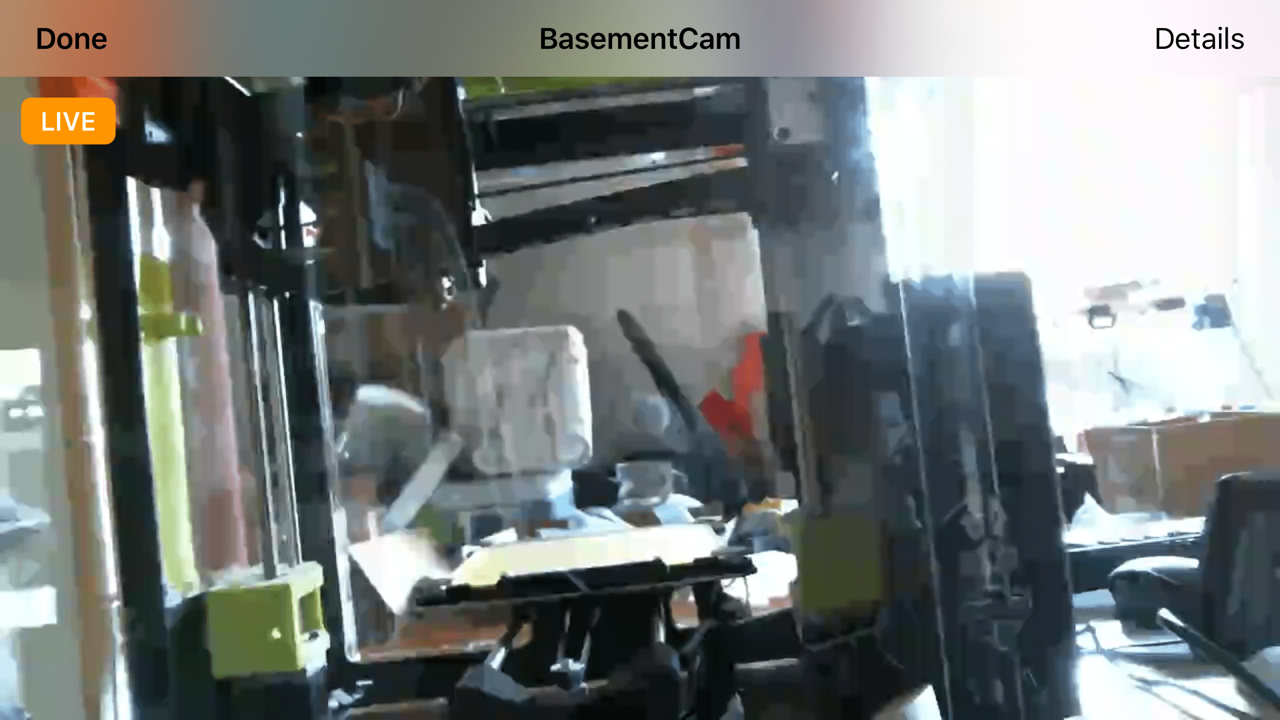
What it looks like?
In Favorites in Home.app
Live steaming view
Future directions
- Connect moar camz!
- Sound streaming included in USB webcams that support it?
References
- tweet that kickstarted my project
- GitHub issue that I partly documented my attempt