
Creating a microSD Ubuntu Mint (Cinnamon) Boot Drive for new Atomic Pi
I have recently received an Atomic Pi from its Kickstarter. And while the pre-installed Lubuntu image was adequate, I wanted to try something more mainstream and also see if I could recreate the Linux hardware support for GPIO and other items on its Kickstarter associated breakout board.
Power on
Here is the “breakout” add-on board schematic for the Atomic Pi.
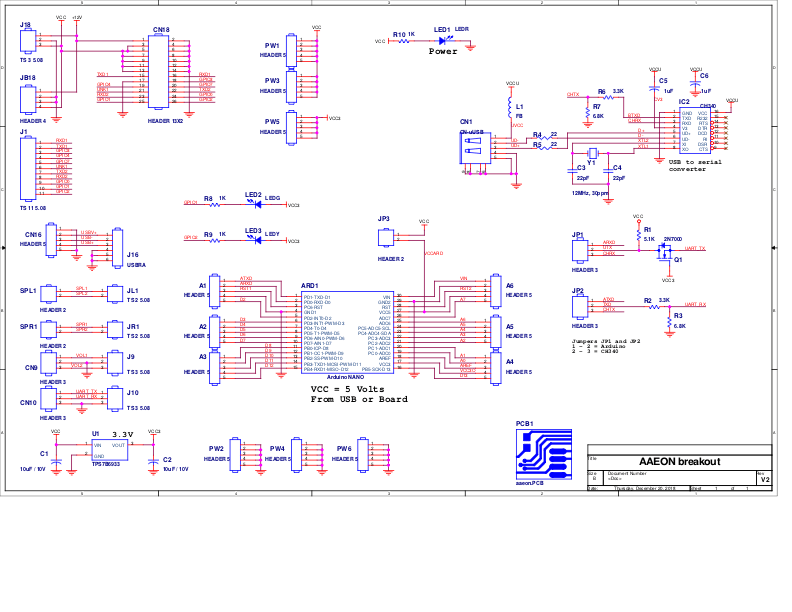
For supplying power, it includes simpler connectors– 4 pin molex (JB18/HEADER 4), screw terminals (J18/TS 3 5.08)– than the 2x13-pin header built into the Atomic Pi board.
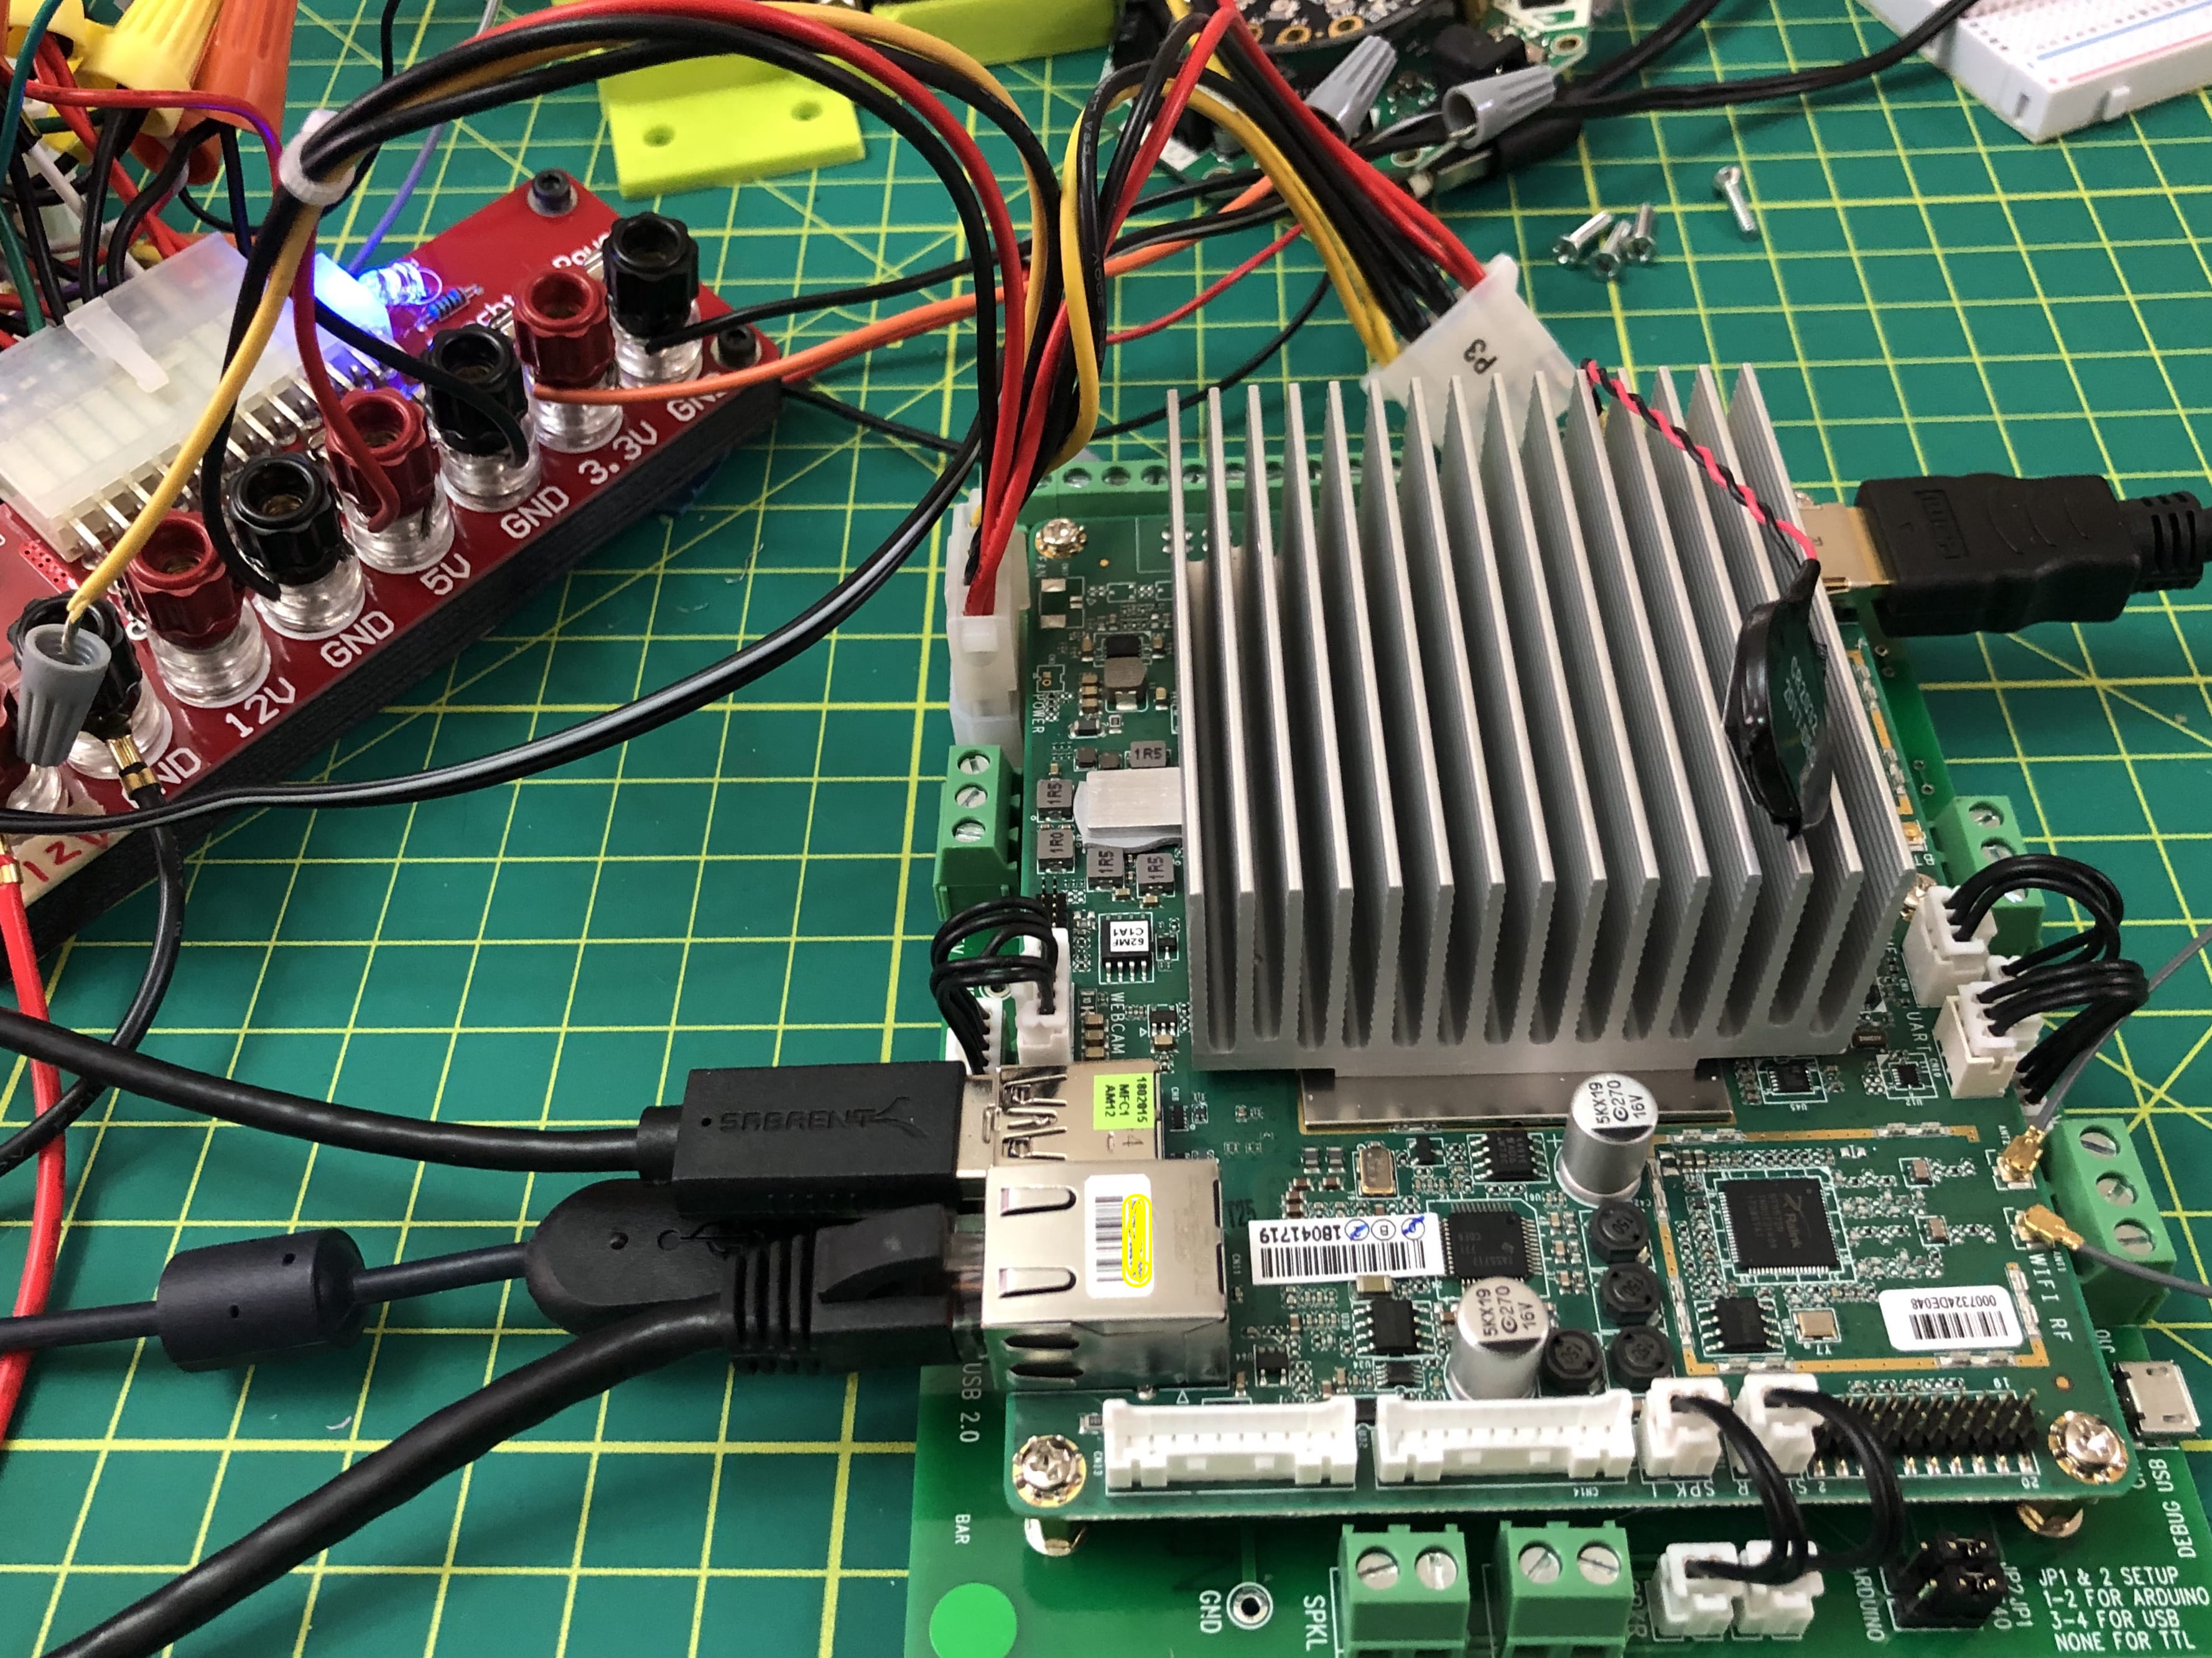
I am using an old computer ATX power supply unit (PSU) with a ATX “bench breakout board adapter”. This adapter that you plug the 20/24 ATX connector into has on its PCB a switch, fuses and wiring posts. Once the ATX PSU is switched on, its +5V supply powers the Atomic Pi+breakout board. The +5V rail provides plenty of current capacity for the Atomic Pi (which is recommended in the +5V @ 3A-4A range). I am already using the +5VSB rail from the ATX PSU for something else, and it is only rated at 2A anyway. Interestingly, the measured +5V voltage at the Atomic Pi board is only about ~4.6V, which appears to be sufficent for normal operation.
Acclimate
There is 16GB eMMC storage included on the Atomic Pi board, which makes it a good value. It came shipped pre-installed with a Lubuntu operating system on this eMMC module. The OS install partition plus an uEFI partition (I think that’s what it is?) takes up about half of the available 16 GB, with around 7 GiB unallocated. The Lubuntu OS/boot partition itself comes with ~1.1 GiB free.
Other storage possibilities are a microSD card slot and a USB 3.0 port (and also, a USB 2.0 port if you have the breakout board).
The first boot, I had connected an Ethernet cable into the APi, and the BIOS waited to PXE network boot, as this is enabled in the uEFI BIOS by default. It will block there unless your hit Esc twice (once for IPv4, another for IPv6). This behavior (Boot from PXE) can be disabled in the BIOS so that intervention at boot time isn’t required.
From there if no other bootable sources are found, the board will boot using the Lubuntu image contained on the built-in eMMC storage.
Fresh Coat of paint
After booting and updating the Lubuntu OS contained on the eMMC, I decided to install Ubuntu Linux Mint 19.1 "Tessa" Cinnamon (64-bit). Furthermore, I decided to install it onto an µSD card. This required additional devices:
- a USB flash drive to put the Live image installer onto
- a µSD card (up to 256GB) that will go into the board’s built-in µSD card slot socket.
- you will also need a USB keyboard (and strongly suggested, a mouse)
- possibly this also means a small USB hub (to connect both the keyboard and mouse), since one of the USB slots is going to contain the bootable Live image installer drive
After downloading its .iso torrent, the USB thumb drive was imaged with the live installer: on macOS, Disk Utility was used to “Erase” a USB thumb drive, choosing “Master Boot Record” partitions format. Then the excellent, multi-platform balena Etcher.app was used to write the .iso image to the USB flash drive.
This imaged USB thumb drive is your installer disk and can be inserted in the USB 3.0 slot on the APi board (don’t insert the µSD card yet). Power on the board with the USB drive inserted into the USB 3.0 connector (the blue colored one on the main board). It should boot to the GRUB bootloader menu on the USB drive, and you can select the Cinnamon 19.1 entry (first one) to boot into the Live Mint desktop (Note: I did not select the “compatibility” second menu item) Also, if it doesn’t see the USB drive and boots into the eMMC OS, power-cycle the board; this happened to me the very first time. It should boot from the USB drive normally; you can verify in the BIOS boot settings that the USB Drive is there on its boot order list.
From the booted live image desktop, now you can connect the network (wifi has an applet you can use, or connect Ethernet cable) and insert the µSD card. Run the installer by click opening the desktop “Install Mint” icon.
In the popup warning/action dialog, I chose the option to unmount the mmcblk0 device (this is the onboard eMMC module) that the Live installer seems to mount. And then chose the bottom “Other” option in the installer wizard to manually choose partitions and drives, since we are going to install to uSD. Don’t want to have the installer guess wrong, and accidentally clobber the original Lubuntu on the eMMC, do we? This is probably what you want too.
On the screen that comes up it had the now-inserted uSD card at /dev/sdb (the installer USB drive at /dev/sda). So I created a new ext4 partition (~32GB should be sufficient, on a 64GB card)), mount point "/" at sdb1. Create a second 512 MB partition FAT32, no mount point, at sdb2. This will not be used or formatted by the installer and is not used further in this example, so you can skip this one. For the GRUB bootloader installation location, I used /dev/sdb (not one of the sub-partitions). Should be good to go, so write the partition tables to disk and go onto the next step.
Choose the appropriate Timezone region config, keyboard layout and language settings, and choose the options for a user account/login and password.
Also, select the Download Third Party drivers when asked.
The installer will download additional files and packages and configure a full, working system. When completed (assuming there were no errors), it will ask you to reboot, along the way pausing to prompt you to remove installer drive. Remove the USB thumb drive (leave the µSD with the freshly installed OS inserted) and hit Enter or whatever to reboot.
The board should reboot and find the Linux OS on the µSD card and boot into the Mint desktop. Login with the user account/credentials you supplied to the installer.

Congrats, you have a working Mint Cinnamon desktop on your Atomic Pi. The “First Boot” app will let you perform additional major configurations. No missing drivers were identified in my install. The original OS partition from the eMMC module labeled AtomicPi will be mounted automatically and shown on your desktop.
I didn’t get around to trying out GPIO access, so that might appear in a future post. Also I have found and am using the /r/Atomic_Pi subreddit
Must affirm third-party consent for Disqus comments to appear.